

Weeks 8 & 9
- Dec 19, 2014
- 8 min read
HAPPY HOLIDAYS!!! Yes, I know it’s not proper English to put three exclamation marks, but it really puts the extra “oomph” in how I feel, especially when I get to talk about guitars (here’s the single exclamation for all of you word junkies ⇒)! If you don’t already know by now, I’m learning the art of lutherie through building my first acoustic guitar at Brain Hawkins Guitar-Building School. (*Click HERE to view the school I’m attending).
I am finally getting over the “sick” I had caught a few weeks back, and while it has prevented me from writing my last two blog entries, it in no way prevented me from going to class… well at least it didn’t as soon as I was eligible to walk... So without further adieu, let’s get started with weeks 8 & 9 of guitar building school!
(*Click HERE to view my previous blog post)
Last time I finished by making/gluing the x-brace & the bridge plate, so when I came back to class (after my sneeze-full sabbatical) I started to shape, peak, and sand the x-braces. I’ve already talked how we made and shaped our braces in previous posts, so if you’re a bit confused about how I did that and want to learn more, I would scroll back a few weeks. After shaping and sanding the X-brace we went on to make the rest of the braces for the top. I can’t talk about them, however, or show you a full picture of the finished product; because it’s a new system Brian came up with; and while I’m not sure what a “former marines” view of punishment is, I do know that it can’t be very relaxing.
If you’d like to see and hear how this amazing new system works, then you’ll just have to buy one of the amazing HAWKINS GUITARS and see for yourself!
You can find out more info into getting one of these custom instruments made especially for you by clicking HERE!
(*Brian, I hope you liked that little commercial spot. Free of charge, but only the first time..)
Here’s a picture that I "can" show you, which shows some of the bracing before we finished and changed some things.

*Drawing our line * Making cut with saw/straight edge

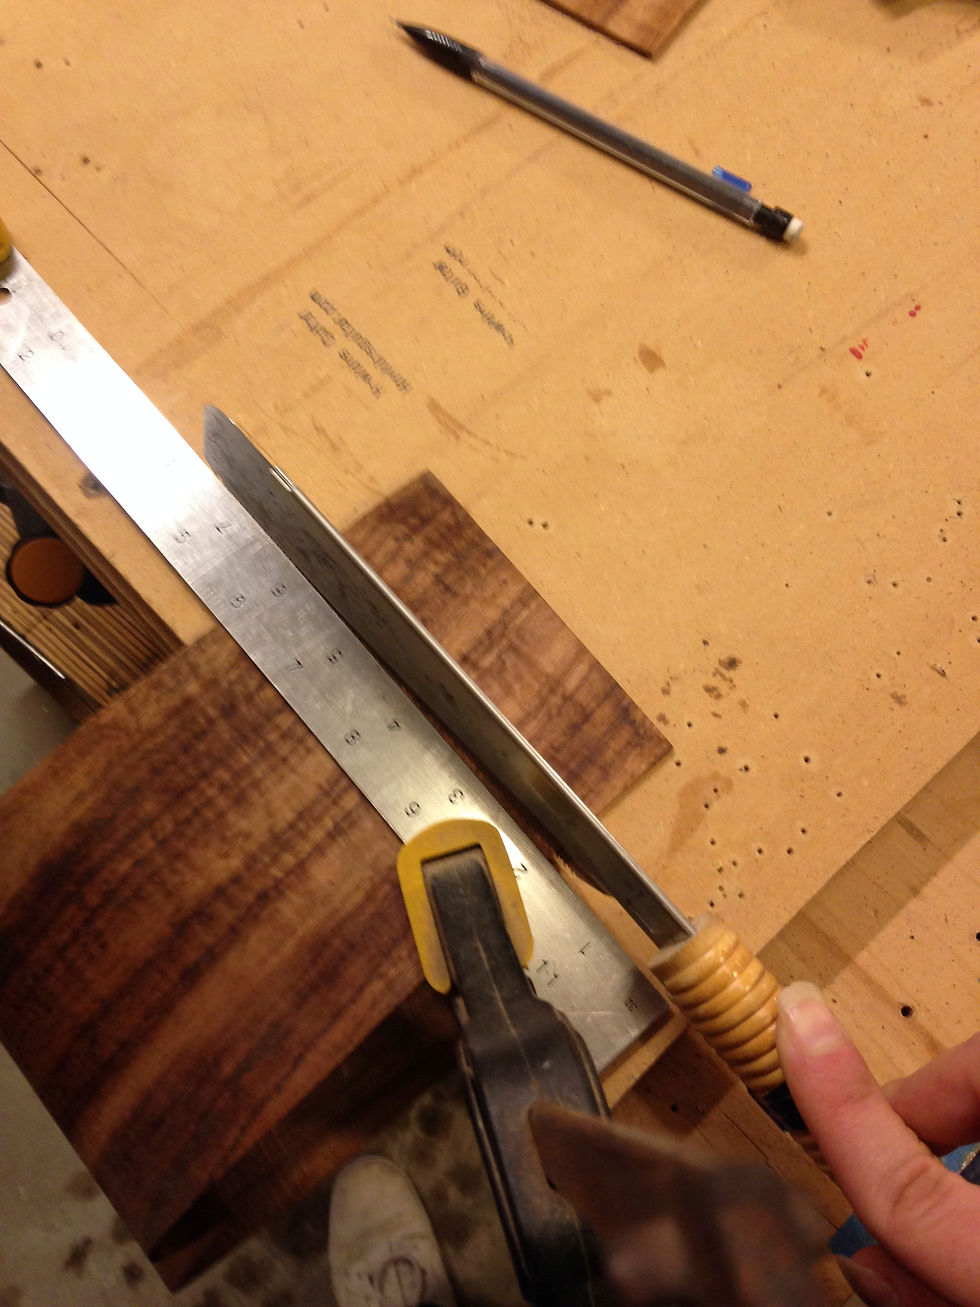
After bracing, we finally got out our sides again, and we drew (from the center line that Brian had made on the mold) where we needed to cut the sides. We did this on both ends, and then we cut along the line we had drawn with the Japanese saw, using a clamped straight edge along the line to guide the saw more accurately. I thought I had this saw down when cutting notches in my braces, but it’s a whole different game working with something that’s more flat; and folks, trying not to hit the straight edge is harder than it looks. Needless to say, I had a few issues.
We then began to plan and measure the tail graft and the neck graft, which is a block of wood, shaped and then glued on both ends to bind the sides together. After measuring and cutting them out, we had to radius both, so we picked out a template that fit the radius of the sides, and used it to draw our radius. We then sanded it down to the desired radius on the belt sander, rounded it out, and then, after putting our sides back in the mold (and making sure everything was centered) we began gluing/clamping the blocks to the sides.

* Three pics above: Measuring, cutting, and sanding the tail/neck grafts
The past couple of weeks the thing Brian has stressed the most (along with the other things I’ve mentioned before) is that everything must be straight and centered, and you must know what side/face of the sides you’re working on, so that the box (which is the body of the guitar) won’t be crooked or anything out of place when everything’s put together.
Finishing the braces for the top, and making/gluing the blocks was all done a few days before we went on to these next steps, so the glue had very much dried on the blocks. We started the day by beginning to radius the tops and backs of our already glued blocks and the edges of our sides. We did this by first, marking out all of the edges with chalk, and then by taking out a jig that was made so we could still put the sides over it while keeping our radius dish over the edges of the sides. We then clamped down the dish. Brian showed me how to move the dish back and forth on the edges of the sides, applying even pressure all around, and moving the dish circularly until all of the chalk marks had disapeared.

* Radiusing dish/jig
We started with the front first, that is, the part where the top of the guitar is going to sit. We radiused the top braces using a 20” radius dish, so we used that same dish to radius the front part of the sides.
Brain joked me all morning before we started about changing my shirt, and stretching my muscles, because it was going to be a “hard workout” today. This is the routine “get into my head” that he likes to do before we start, so I didn’t take it too seriously. Although, it wasn’t as bad as he said, I did feel like I just had a great workout!
I then undid the jig, took out the dish and flipped the sides to the back, where the back plate will sit. The back braces had a radius of 15” so I switched the dish out to the same size, and then I mad the same movements on the back side that I had on the front; which was easier, because the jig was heavier, or I became smarter, or both! It’s hard to tell between genius and simplicity.
I tried making a video of this process, but it’s kind of hard to do while you’re using both hands to sand; and even though I had another option, I knew that while my phone is called an "apple", it hardly tastes like one.
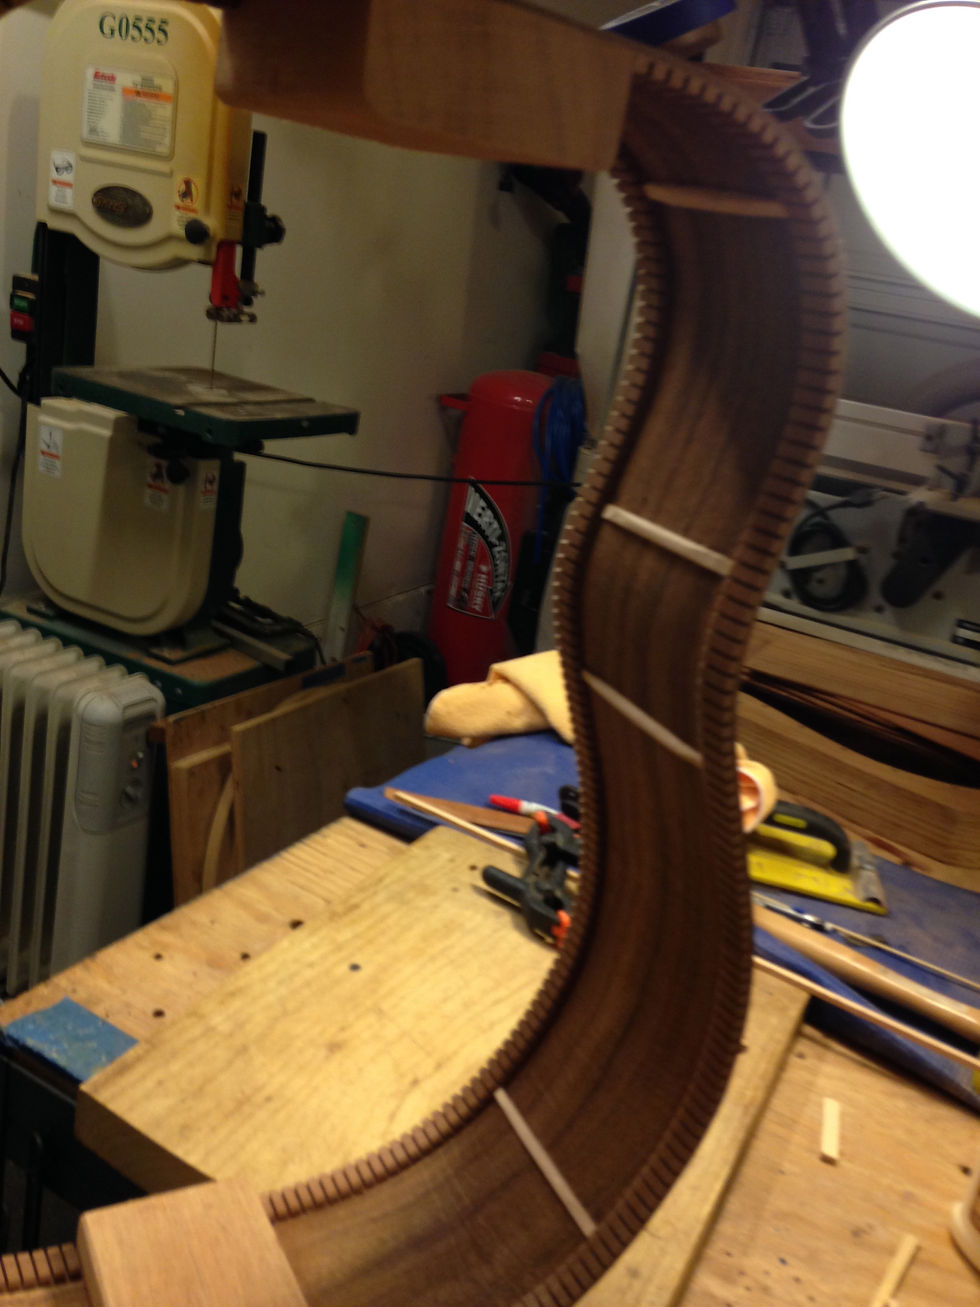
* Clothes Pins on Kerf to clamp for gluing

After getting the back and front edges of the sides “radiused” we began to work on the kerfing. Kerf is really just a long wooden strip with cuts along it, so it can be bent around the perimeter of the guitar.
The kerf makes the sides stiffer, it is also where the top and back are held to the sides, so it’s super important! It was easy enough to do. I just had to cut the pre-made kerf to fit on the sides then glue and clamp with clothespins before it dried, making sure everything was even, that the kerf was facing the right direction, and a little bit of it went over the edge, so we could sand it at a radius later. I cut it too short a few times, so I had to glue a single
piece of kerf to fit. * Finished kerf

After the glue was done drying for the kerf on both the front and back of the sides, I radiused them, using the same process I had done before.
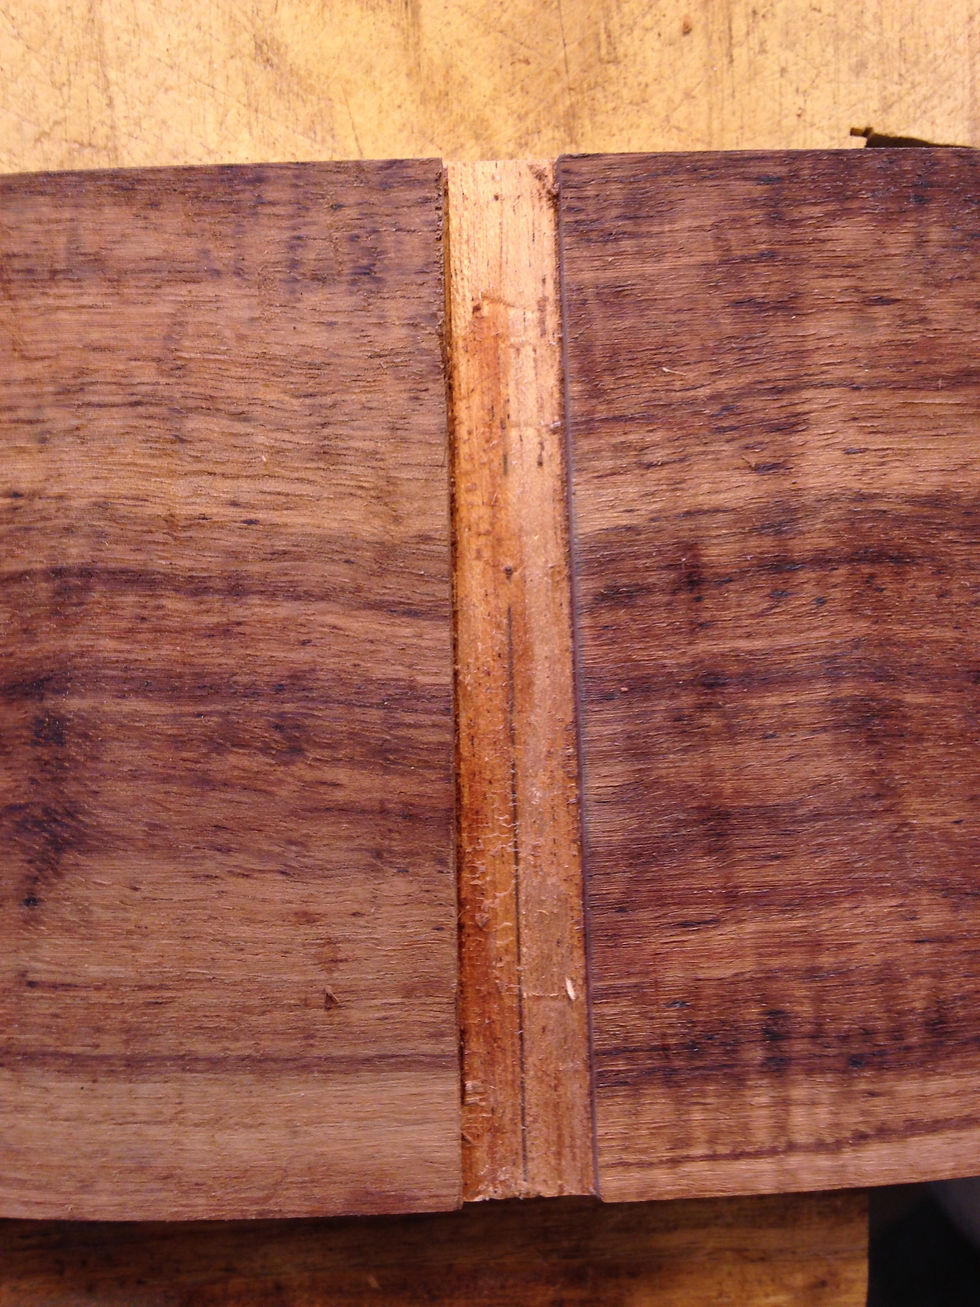
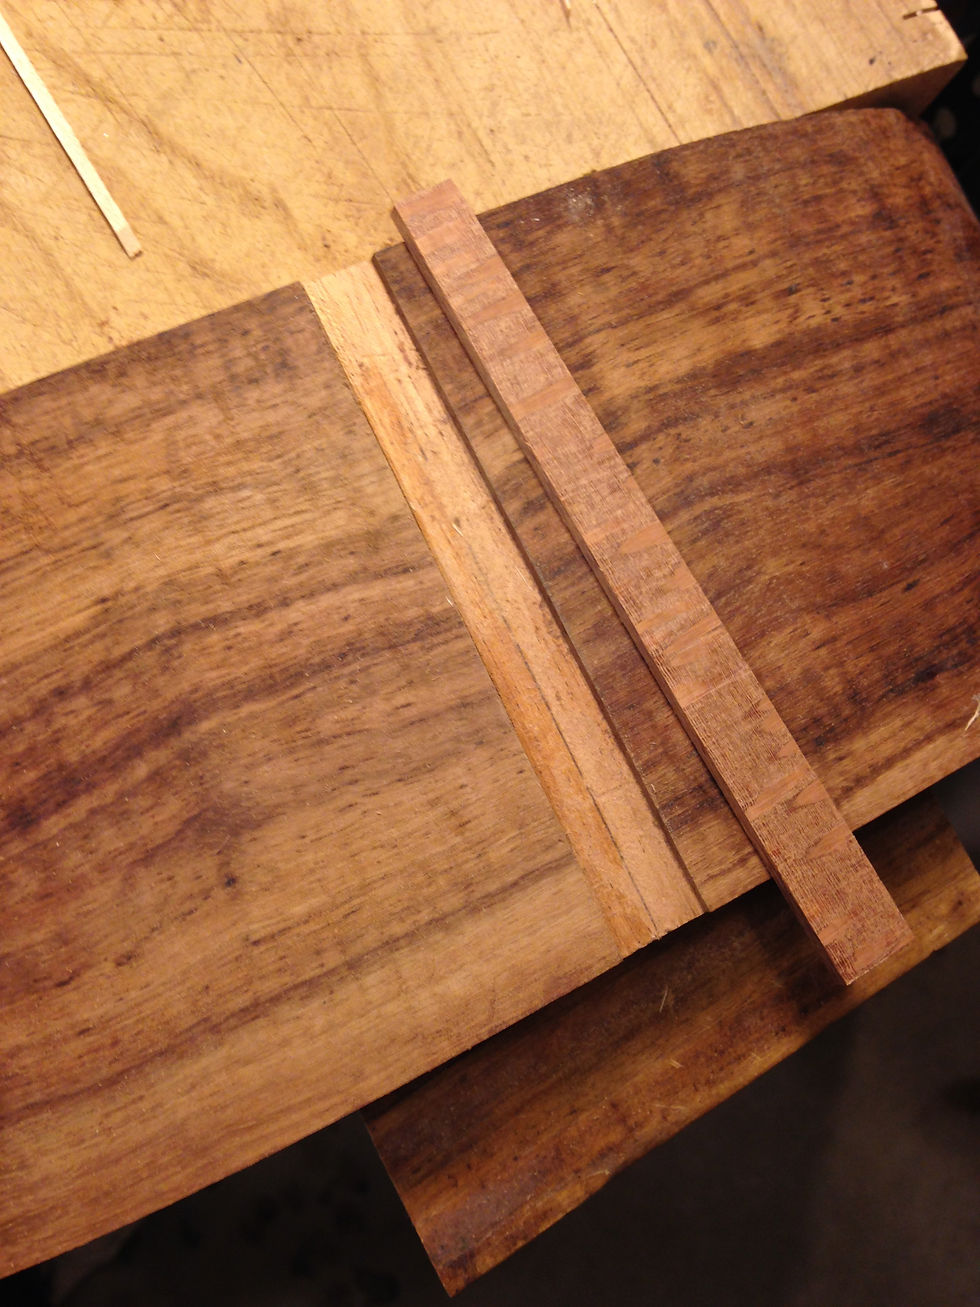
When I was finished radiusing the sides, we began to choose wood for the “end graft”. The end graft is a traditional strip of wood, usually contrasting with the back and side wood, which you put over the tail block to give the end of a guitar a clean and finished look. I ended up picking out some really cool figured/spotted lacewood for this! We started making the graft by centering out the end graft template with the centerline that the sides naturally made when joined. We began by cutting out and sanding our strip. We then cut along the line we had made using the Japanese saw again, and this time, with Brians help, I started to understand how to control it more when using it on a flatter surface. I cut until I felt the touch of mahogany (that is the tail block). We then used a chisel to knock out the wood, and used a scraper to get all the glue off. After that, we took the strip to the belt sander, and sanded it until it was wedged up perfectly in the hollow slot we had made. We also added a few thin pieces of wood as a decorative outline along the outside of the strip.
* Top left: end graft template, top right: chiseling out our cut (after using Japanese saw), bottom left: finished cut, bottom right: end graft and hollow


After this, we began to sand the end graft, so it would look like one piece with the rest of the wood. For this process Brain had me watch him do it, as it took a lot of experience to: hold/balance the whole of the sides, put it up to the belt sander, and make sure that when you touched it to the sander everything was even. Also, making sure you didn’t hit what you’re not supposed to. After sanding it using the belt sander, he used some loose sandpaper, and then finally a hand sander, making sure everything was even!
*Top left: end graft on belt sander, top right: using loose sanpaper,bottom: finishing with hand sander


Here’s what it will look like once the finish is put on…

Super cool, right?
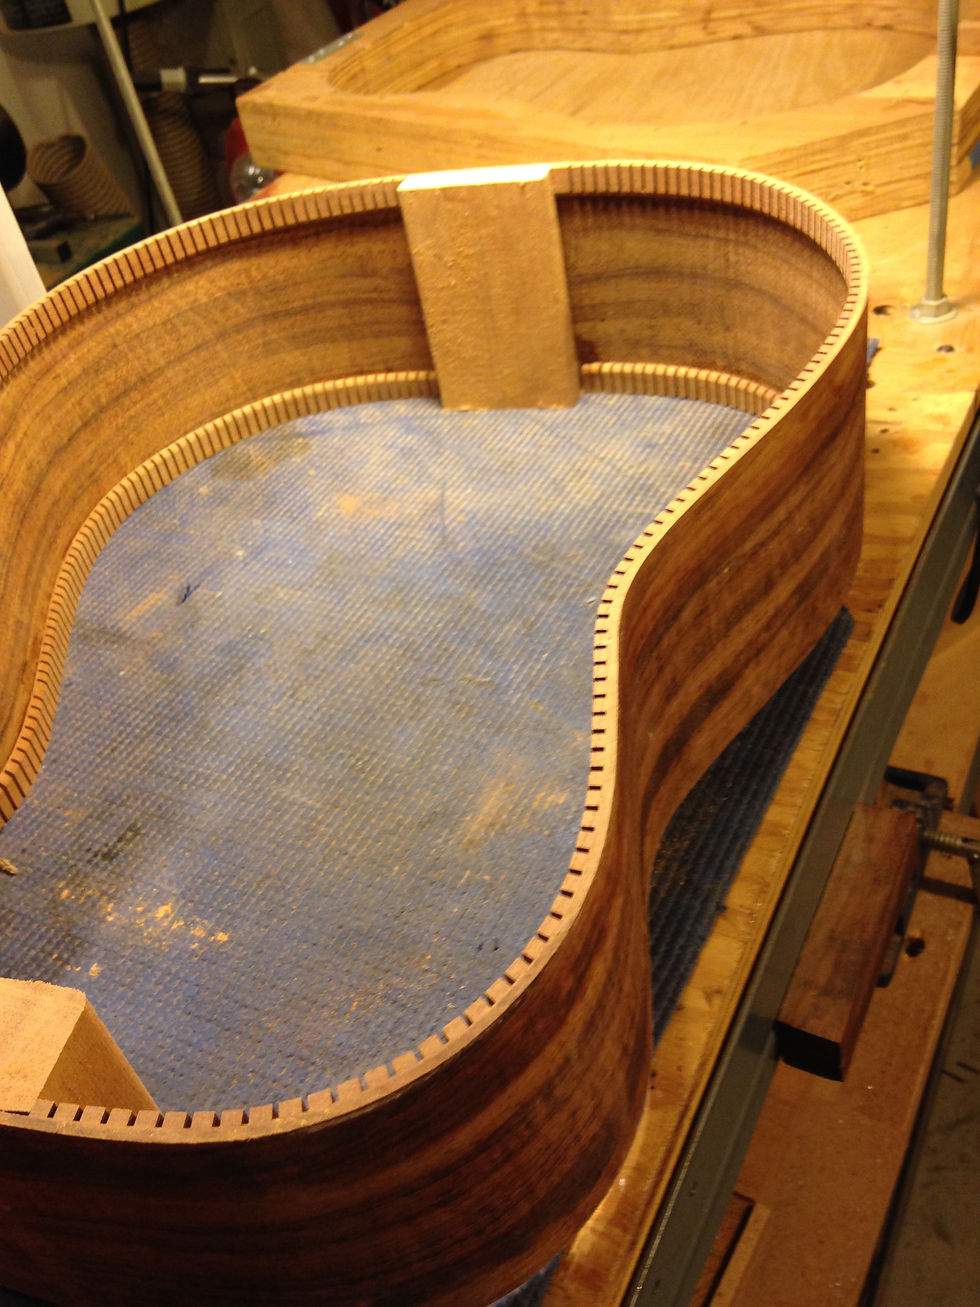
After the end graft was made and sanded, we began to measure and make the side braces. These help stiffen and support the sides, they’re not needed, but most builders put them on as an extra precaution. We marked where they were to go by looking at where the end of the X-brace fell, as demonstrated in the picture below...

Brian showed me how to make a side brace and then I shaped and sanded eight of them. I should have marked them before gluing, but I ended up getting them mixed up, and after clamping one side down, I had to re-make two more braces (which I then marked by number). Again learning that simplicity is genius.

* Side braces before and after gluing
The last thing we did that day was mark out on the back braces where the sides would sit, and then cut along that line. Brian doesn’t tuck his back braces as he does his top, but cutting them he makes them “look” tucked. Everything had to be centered, or else, again, the body would be crooked when you went to put it together, so we checked and double-checked our lines. I could have kept on going, and was so focused by the end that I thought it was an hour earlier than it actually was when finished!

* Marking our lines to cut for false tucking
Guitar building is by no means easy, and becoming a craftsman is even more difficult; but each time I leave, no matter how hard or intimidating, I always want to go back the next day. I know by this, that this is what I want to do! I know I say that a lot, but I’m very grateful.
Thanks for coming along with me on this journey so far; it is for sure a blessing even to be able to write about something like this. If you’re ever in the Virginia Beach, Virginia area, make sure to visit Hawkins Guitars! Also, make sure to “Like” their Facebook page, by clicking HERE.
If you liked this blog post and want to be notified of future updates, please “subscribe” by entering your email in the subscription box below.
Again, Happy Holidays!
~Daniel
Comments