

Weeks 4 & 5
- Nov 18, 2014
- 4 min read
Hi everyone, welcome back to my guitar building blog! This is a blog dedicated to my steps and experiences in building my first guitar at Hawkins Guitars. To check out my teacher Brian Hawkins Website or Facebook page click on the underlined clickable links. If you haven’t read my previous blog post, click HERE.

Well it’s been two weeks since my last post, but I thought it would be appropriate since the last two weeks I have been learning to make, shape, glue, and scallop the back braces. So without further adieu, let’s get started!
We decided on double X-bracing the back instead of the normal lateral braces, after a conversation about sound and strength.
We first measure out, cut with the band saw, and thickness sanded the braces to our desired measurements.
*Radiused ruler

We then drew our “radius” line by using a ruler pre-shaped to our desired radius line and after we used the belt sander to sand it just a fingernail away from our drawn-out line.

We marked out the radiused side, drew out our pencil marked sanding lines, and then did more fine sanding.
I won’t tell you all the mistakes I made during this time, some of them that Brian expected, so it turned out all right, but as I said before, I am truly learning to train my hands to act as a tool.
*T-Bevel

Fine Sanding*
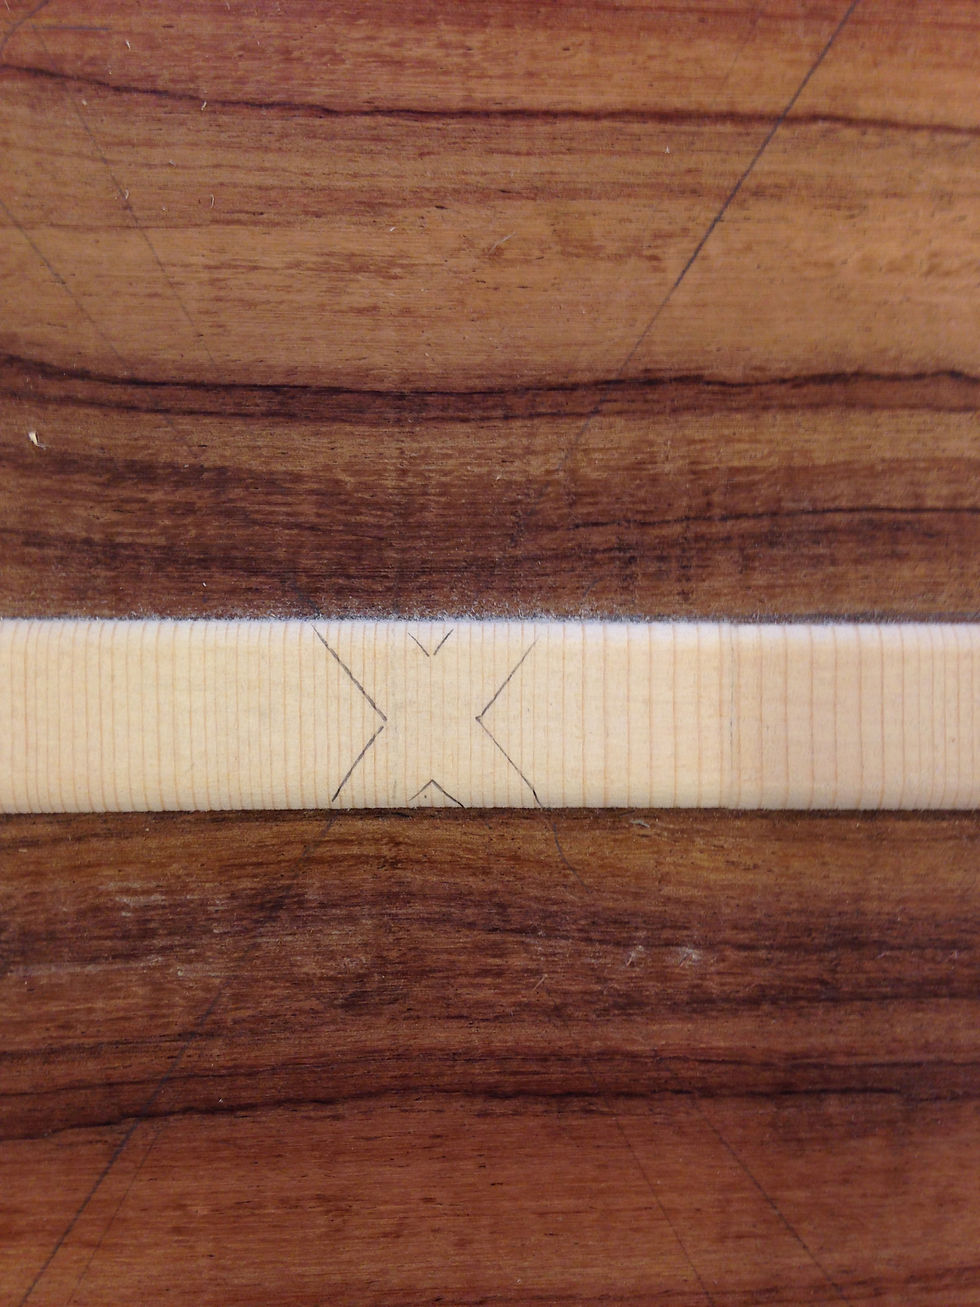
After this, we measured out our x-angles using a T-Bevel and a technique Brian taught me.
We then marked out our notches, where one brace will sit on another making one x-brace. Brian showed me how to mark out everything, using our T-beveled angle.

Then it was time to use the Japanese saw….
This was probably the hardest for me. I needed my whole hand and body relaxed and let the saw do the cutting. I tend to tense up, and thus I want to press too hard, but you have to be super relaxed using these tools. I think I will get the hang of it in time!

*Japanese Saw
We cut out the notches (which weren’t flush), so we had to knock out a bit more
using a small tool, and glued the x brace. We used the saw,
and a scraper to cut out the “X” so we could fit the x-brace flush in with the back brace. The whole bit of that hollow had to be cleaned before we could glue and put in the x brace.
This whole process was done twice, and then we cut out the x notches in the joint graft. Next came gluing down the braces…
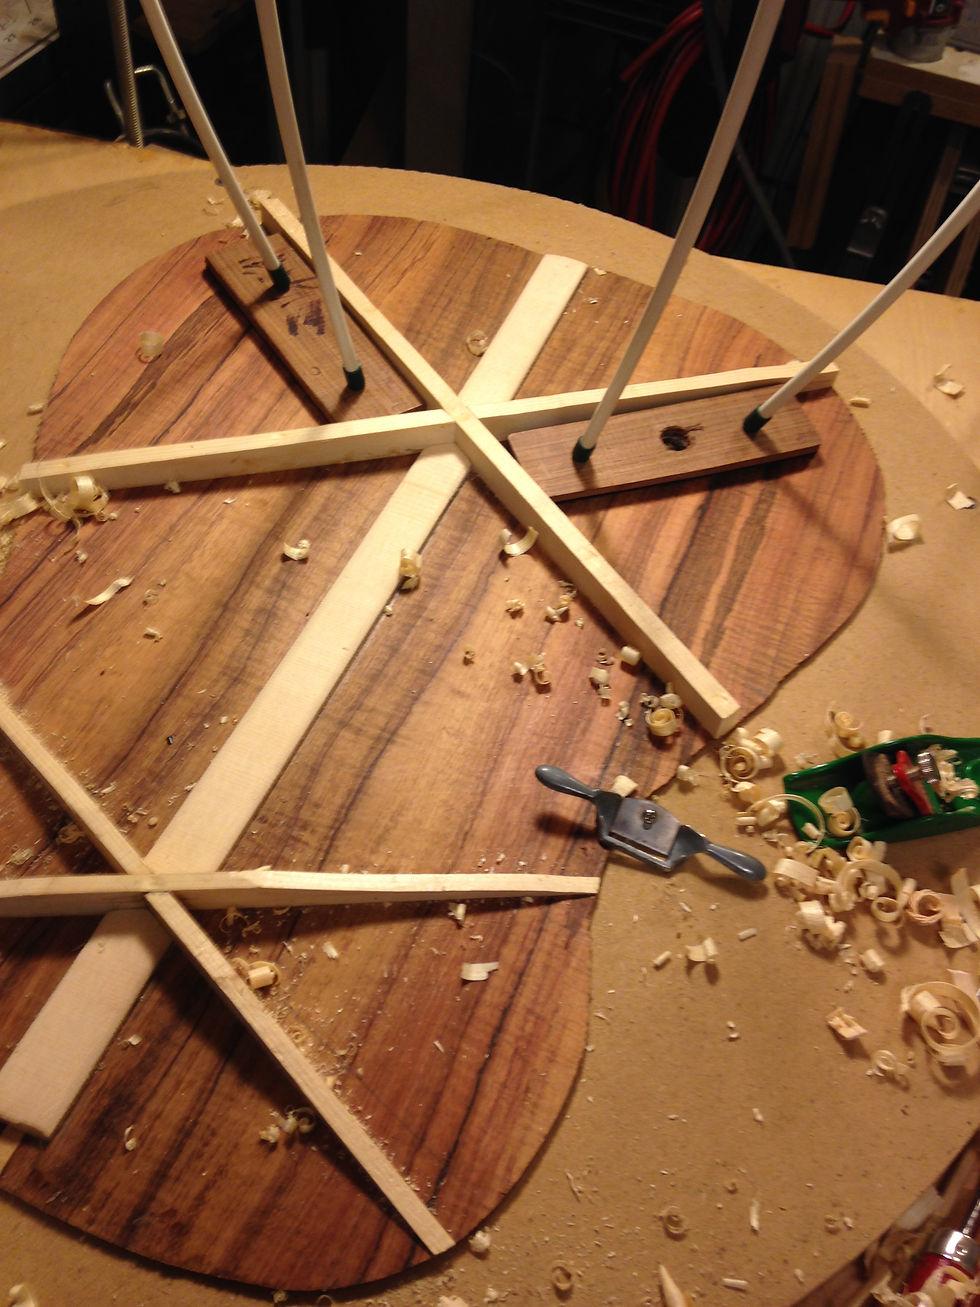
Brian had already taught me how to clamp down the braces to let the glue harden and set by using what is called a “go bar system”. I would explain, but I think you’ll get a better picture of what I’m talking about if I just show you.
Here it is…
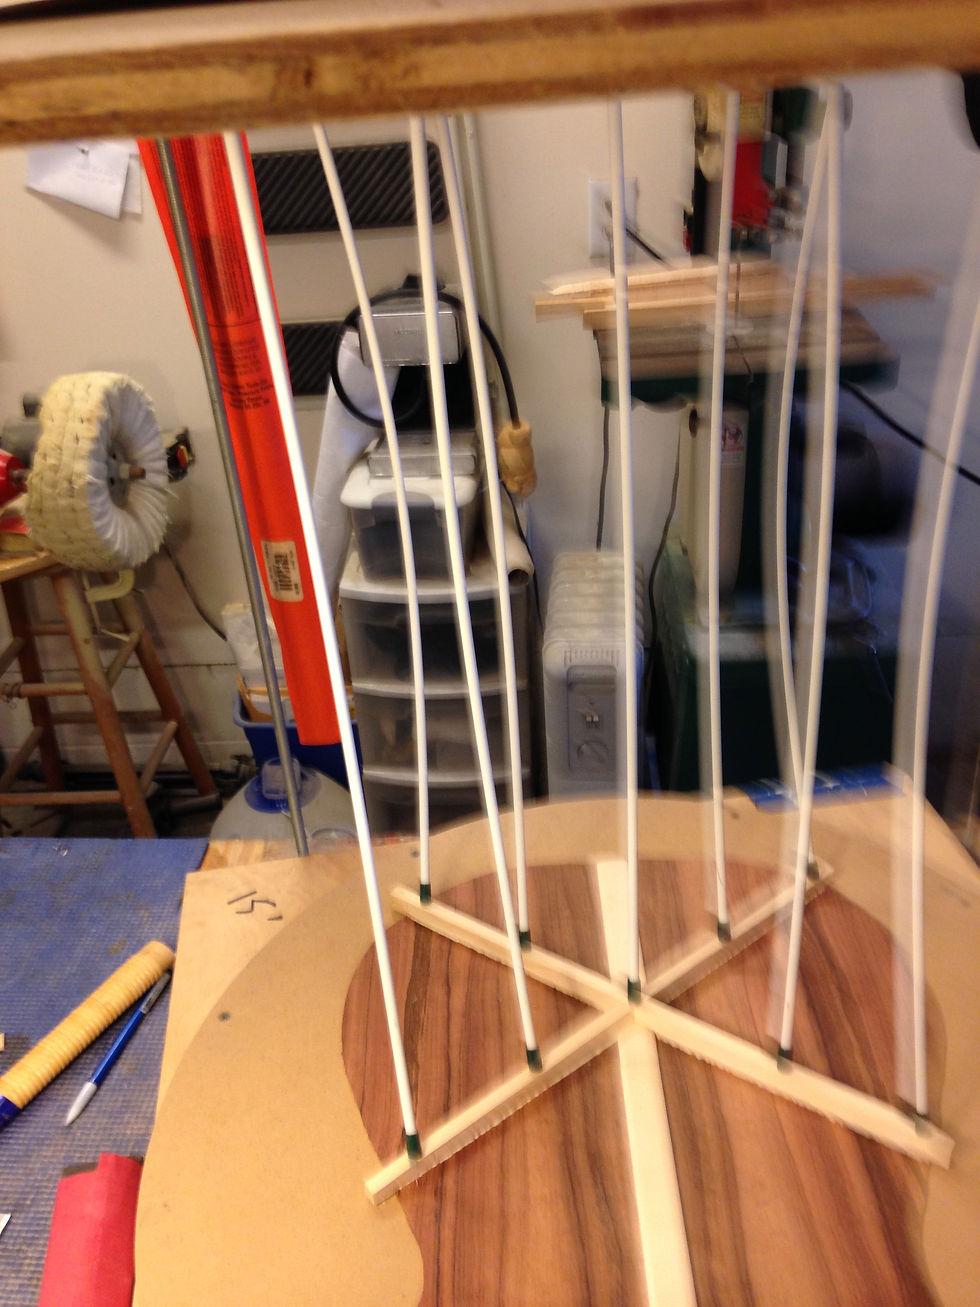
I did a couple of dry runs, as it’s tricky to put the glue on, spread it, and clamp down the fiberglass rods, especially since if I made a mistake and put the rods uneven with each other it could slip and damage the guitar plate. I did this a couple of times and then glued the braces, wiping up any access glue after with a pointed stick and some other tools. It’s important to always keep everything clean as any extra glue will prohibit sound.
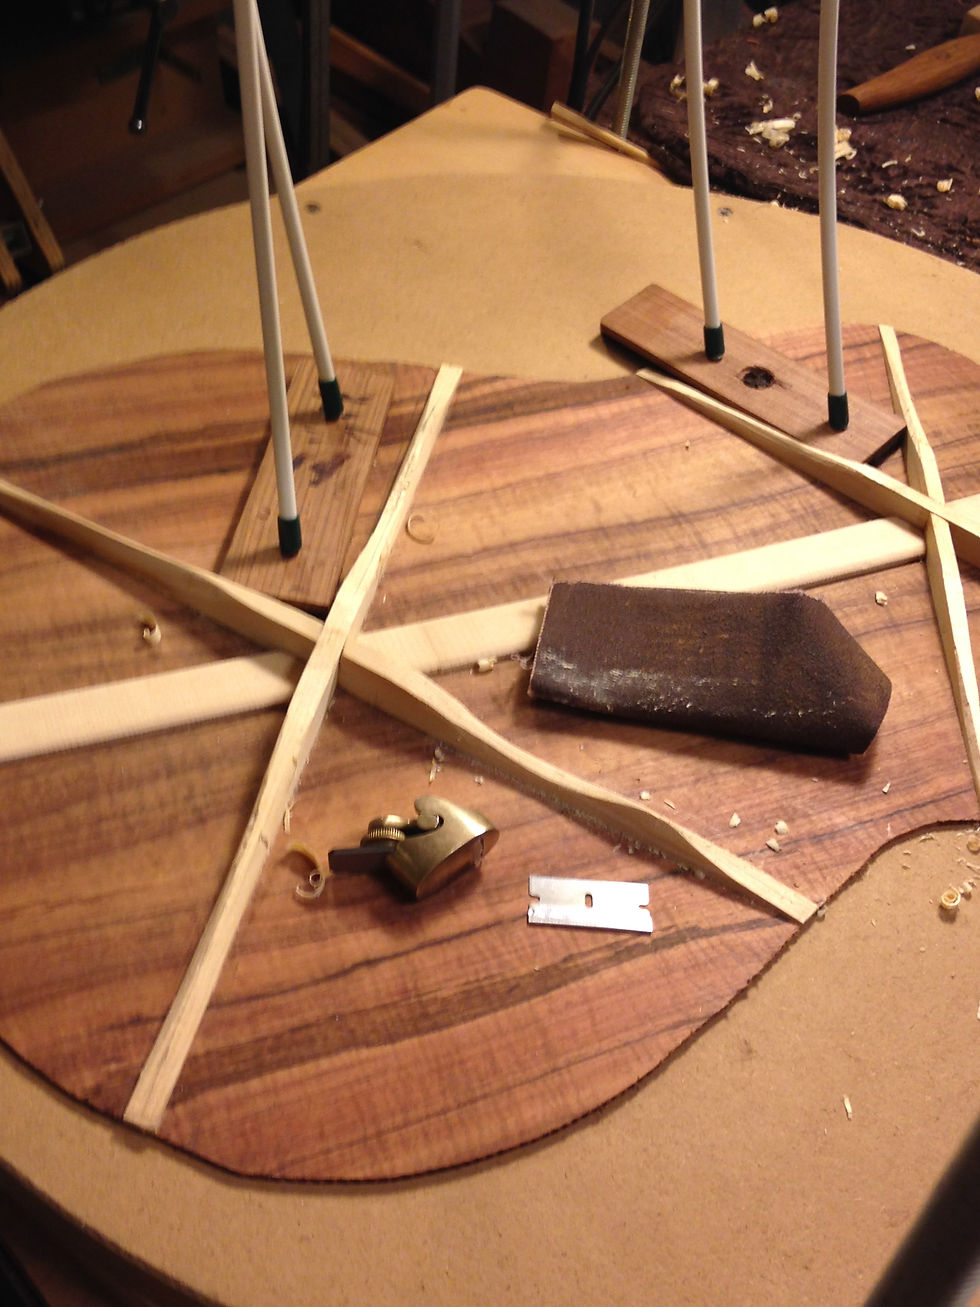
When the glue dried we took off the ends of the braces hanging off the plates with the band saw.

* 4 pics of shaping the braces

We then got to what I think will be my favorite part so far, when I get the hang of it: shaping the braces. Like sanding the joining strip, I had to learn how to use different tools at different times. We first got them to the desired height, and then worked on the width and shaped them to make them look pretty.

At the end of the day Brian was able to show me a how to sand the brace and make it smooth. I’ll finish doing that next week.
These past couple of weeks have been more challenging than the others, but I am really coming to appreciate guitar making as a real skill and craft! The time and care it takes to do each little job within the process is well worth the money you pay for custom instruments. Most guitar players don’t realize it, but it is sometimes worth even more the price they pay! I can’t wait to be able to develop my muscle memory, so that I can rally start to “create” my own instruments! I’m learning that I have to be in the moment for each step, because each step is so vital for the completion of an instrument. I have to put aside the idea of the finished product, and focus in on the craft. I really love it so far, and I am excited for the future!
Until Next time,
~Daniel
If you liked this post and want future updates, please enter your email in the subscription box below!
Comments