

Week 3
- Nov 2, 2014
- 4 min read
Hey guys, I hope you’re keeping bundled up in this November weather! As always, I’d like to start out with an introduction about what this blog is all about. I’m learning the art of building guitars, by taking a one on one course from Brian Hawkins at Hawkins guitars (You can click HERE to “like” his Facebook page, or click on his name above for a clickable link to his website). This blog is all about my weekly lessons and steps to build my first guitar!

Well, last week I talked about bending the sides, and gluing the plate joints (if you haven’t read my previous post you can read about it by clicking HERE). The glue had dried on the back faster, so I had already cut that out using the band saw last week. With the top sitting in the jig, clamped in for a week, the joint was very much dried as well. I took the top out of the jig and we began working on both the top and the back by scraping and sanding the joints to make them level and smooth with the rest of the plate. The reason I always say “we” is because Brian will first do something and I then will follow suit until it’s done (unless I take too long, hahah!).
I learned to use multiple senses when sanding the joints. I had to feel the joint strip on the back (I first sanded the back joint, the top doesn’t have a strip), and at the same time look at it, making adjustments between scraping and sanding based on what I saw and felt. I had to judge which scraper to use at what time, and how to use it, applying pressure and guiding everything with my fingers, making sure there were no dips from me sanding too hard. The movements I made were very important as well! The direction I moved in, inevitably became the outcome for how “even” everything turned out when finished. I had to know how much to sand, and when to switch between the harder hand sander and the softer hand sander.

After watching and beginning to apply this skill, it shortly became the most favorite thing I have done so far! I felt very connected to the wood; it really felt like I was “creating”. It’s something I can’t really explain by putting it into words. It’s almost spiritual, very life giving!
* Picture of sanded back joint

Something that Brian really stressed at through this process of scraping and sanding is that the movements, the position, and the pressure that you use Is very important. He stressed that your body is like a tool, and you must learn to control it. He said that the hand and machinery tools will only work as they were created, and if there is something “off” about what your doing or how it turns out, it’s really you. That really fell into place when making the rosette (which I’ll explain later). The more I applied what I learned, the more I fell in love with the repetitive discipline of controlling my body movements.
After evening out the joint on the outside of the back plate: we measured, cut the pieces, and glued the back graft. This is the brace that covers the joint strip on the inside of the guitar, and gives strength to the back. I admit, I’ll have to work on the simplicity of gluing; I get a bit overexcited when I’m in a time crunch, because the glue dries faster here. After gluing, we clamped the brace to the back, and I cut out the top shape on the band saw. I then began working on scraping and sanding the joint on both sides of the top plates.
*Sanded top joint

*Joint graft, clamped after gluing

During this process, we also began to plan and draw out the rest of the bracing pattern for the back.
We put the top away, and began working on the rosette. I wanted a wooden rosette, which was a bit harder to make; because of this I watched Brain do a lot of the sanding and cutting. I would explain this process further, but I have a video that will do a better job explaining.
Here it is…
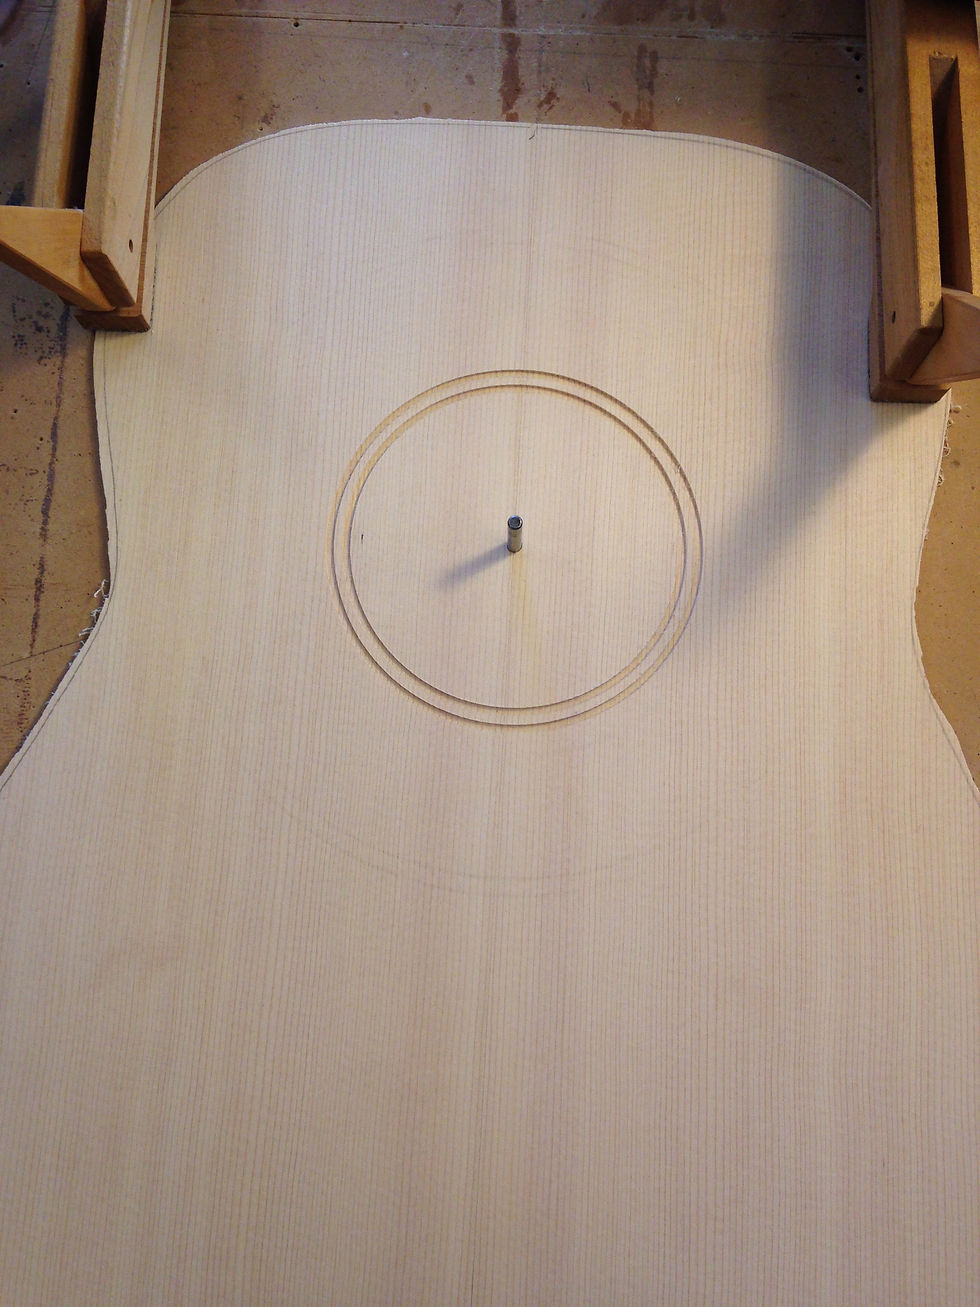

I did however make the cut in the top using a dremel tool where the rosette will sit. The object is to get as close to the bottom of the wood plate without actually going through. We also wanted the sound hole to be about four inches across, so we has to make adjustments for that, drawing it out and applying that to the tools we were using before actually doing it.
After this, we glued in the rosette and clamped it down to dry. Next week we’ll put it through the sander to even everything out.
By this time the glue for the back graft was done drying, and I sanded it down, to the desired shape, for sound and aesthetics (as this part of the back will be seen through the soundhole).

*Joint graft, before sanding.
After class I got to play one of Brians electrics that he had just finished. I hadn’t played an electric for a few years, and was catching the bug again. It had such a sweet tone! I wish I could have kept it.

*Click HERE to view this guitar for sale on his site.
Every time I go to class I get more and more passion and confirmation that this is what I want to do! I know it will take years for me to be able to start making quality custom instruments for people, but I am so thankful for what I’m learning in the mean time, and looking forward to learning more!
If you liked this post and want future updates on where I am in the building process, please enter your email in the subscription box below.
If you’d like to hear more about Hawkins Guitars, Click HERE to go to his website, or HERE to like his Facebook page!
I hope you’re getting a chance to rest a bit; sipping cocoa and watching a fire in your fireplace as we delve into this colder weather! I think I’ll try and do that, but add few strums on the six-string alongside it. I can’t wait to do this while strumming on my own guitar!
Until next time…
~Daniel
Comments